How to create a payment form?
With Deftform, you can easily collect payments with your forms. All you need is a Stripe account. Follow this step-by-step guide to start collecting payments in 2 minutes.
Please note that it is currently not possible to use a payment form within an embedded form. You will have to use a dedicated link, e.g. forms.domain.com/{form-id}, if you want to use a payment form. We will offer support for embedded forms; stay tuned.
1. Obtain API keys
To get started, login to your Stripe dashboard and find the "Developers" link. It's located in the lower left corner:
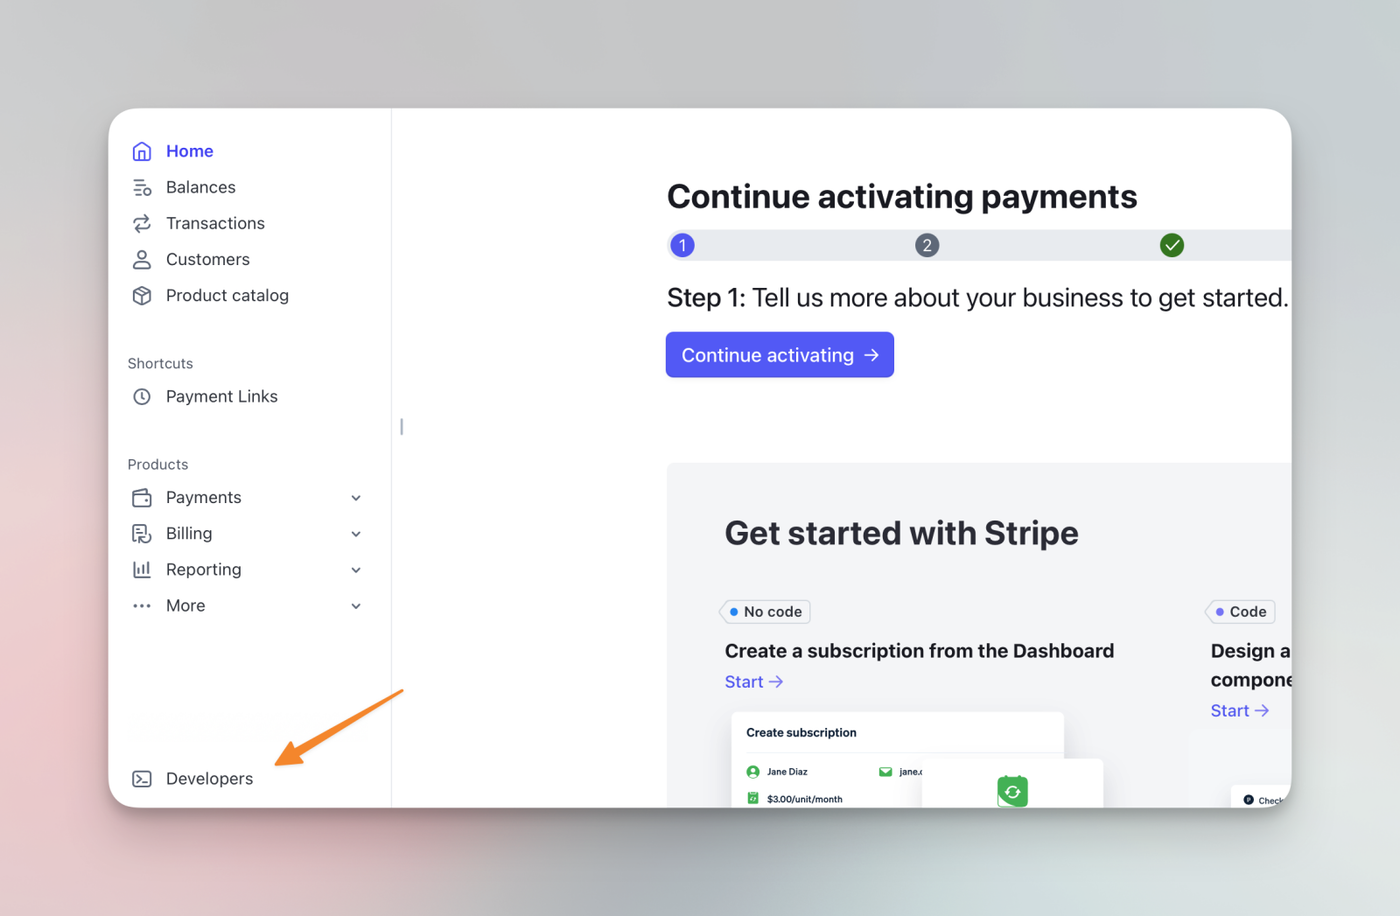
When in the "Developers" section, go to "API keys". There you'll see the Publishable key and also the Secret key, you will need these.
You may also create a restricted key in the "Restricted keys" section. The Secret key would essentially give us full access to your Stripe account, but we don't need that. When creating a restricted key, choose the "Providing this key to another website" option. Give it a name and enter https://deftform.com into the URL field. If you decide to enable the "Customize permissions for this key" option, please make sure we're allowed to create and delete webhooks. But you can also skip the checkbox.
There are keys for both Live mode and Test mode. We suggest to paste both into Deftform (next step), so you can try out payments without real money and make sure everything works as expected. You can switch the mode in the Stripe dashboard. You cannot use the same keys for Live and Test payments.
Testing card payments: Use 4242 4242 4242 4242 for payments in Test mode. You can use any future date for the MM/YY field and any 3-digit number for the CVC.
2. Connect to Deftform
Now that you have your API keys ready, head over to the Deftform "Notifications / Connections" settings and scroll all the way down to the "Payments" section. Paste your API keys into the correct fields and save the settings.
Deftform is now connected to your Stripe account.
3. Create or edit form
Create a new form, or edit an existing form. In the form settings, open the "Payment" section and toggle the "Enable form checkout" checkbox. You are now able to set a few defaults, set the payment mode for this form and also add Pricing IDs. A Stripe Pricing ID always starts with price_, followed by a bunch of random numbers and letters. It will look something like this: price_2Q6zDoBm7Liqyjg0cTdiTuud
4. Obtain Price ID
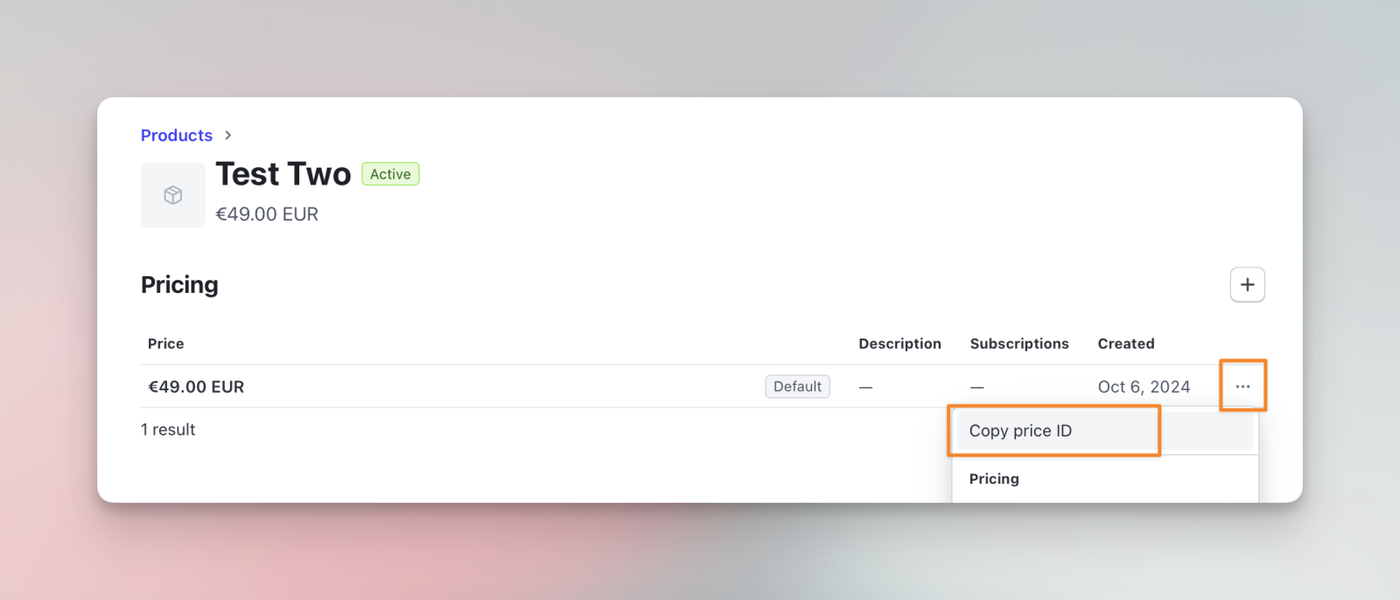
Go back to your Stripe dashboard and locate the "Product catalog" section. If you haven't created a product yet, create one. A product usually has one or more prices, each with their own ID. You can then copy the Price ID (not Product ID) and paste it into Deftform.
If your form has only one product, the checkout will show after the form was submitted. Respondents will not be able to select any product before that. When multiple Price IDs are added, respondents can select products.
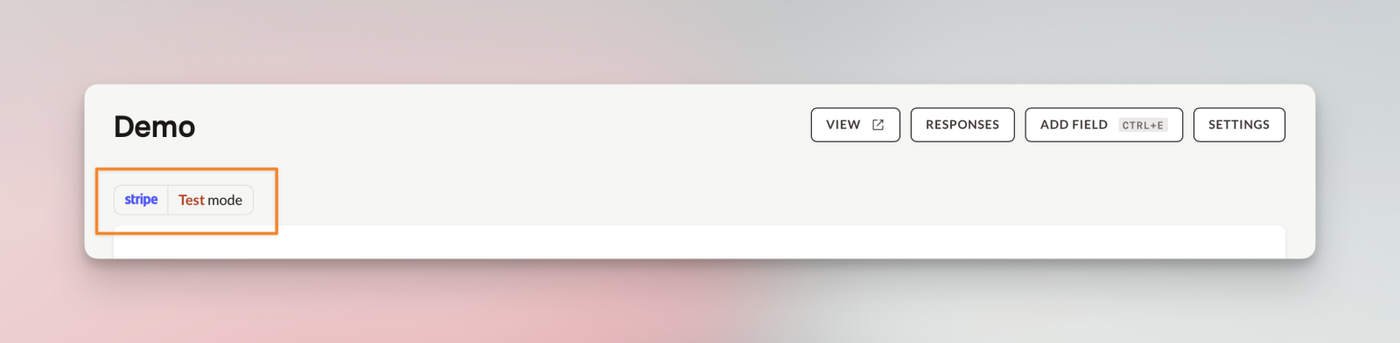
5. Test and go live
As mentioned earlier, we suggest to test payments before sharing it with people. Make sure your setup works as expected, then switch to live mode in the form settings. When everything is done, you'll see which payment mode is currently active for a form.